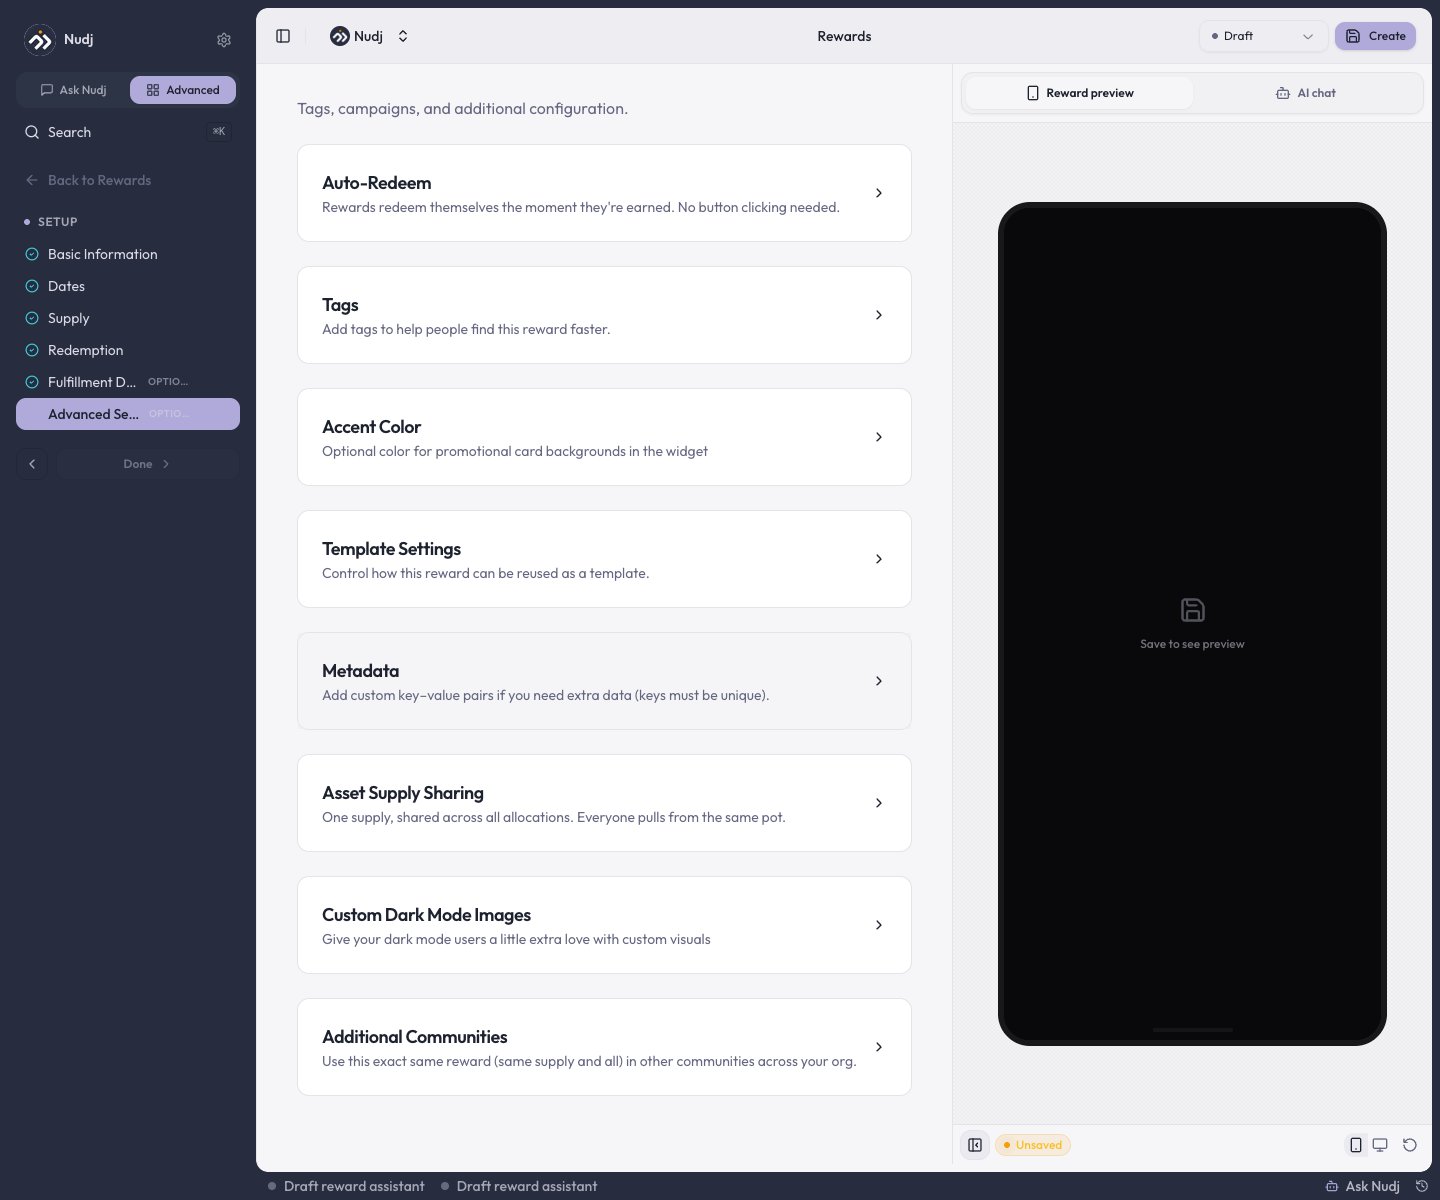
The reward studio, step by step: basic information, dates, supply, redemption, fulfillment, and advanced settings
Rewards use the same studio layout as challenges, achievements, and posts: a step sidebar on the left, the form in the middle, and a live preview on the right.
Engagement -> Rewards -> Create Reward (or the top-nav New -> Reward menu item) opens the reward flow. You first land on the template library - pick a template, or choose Create blank to open the type picker.
The template library: pick a practical starting point, or start blank.
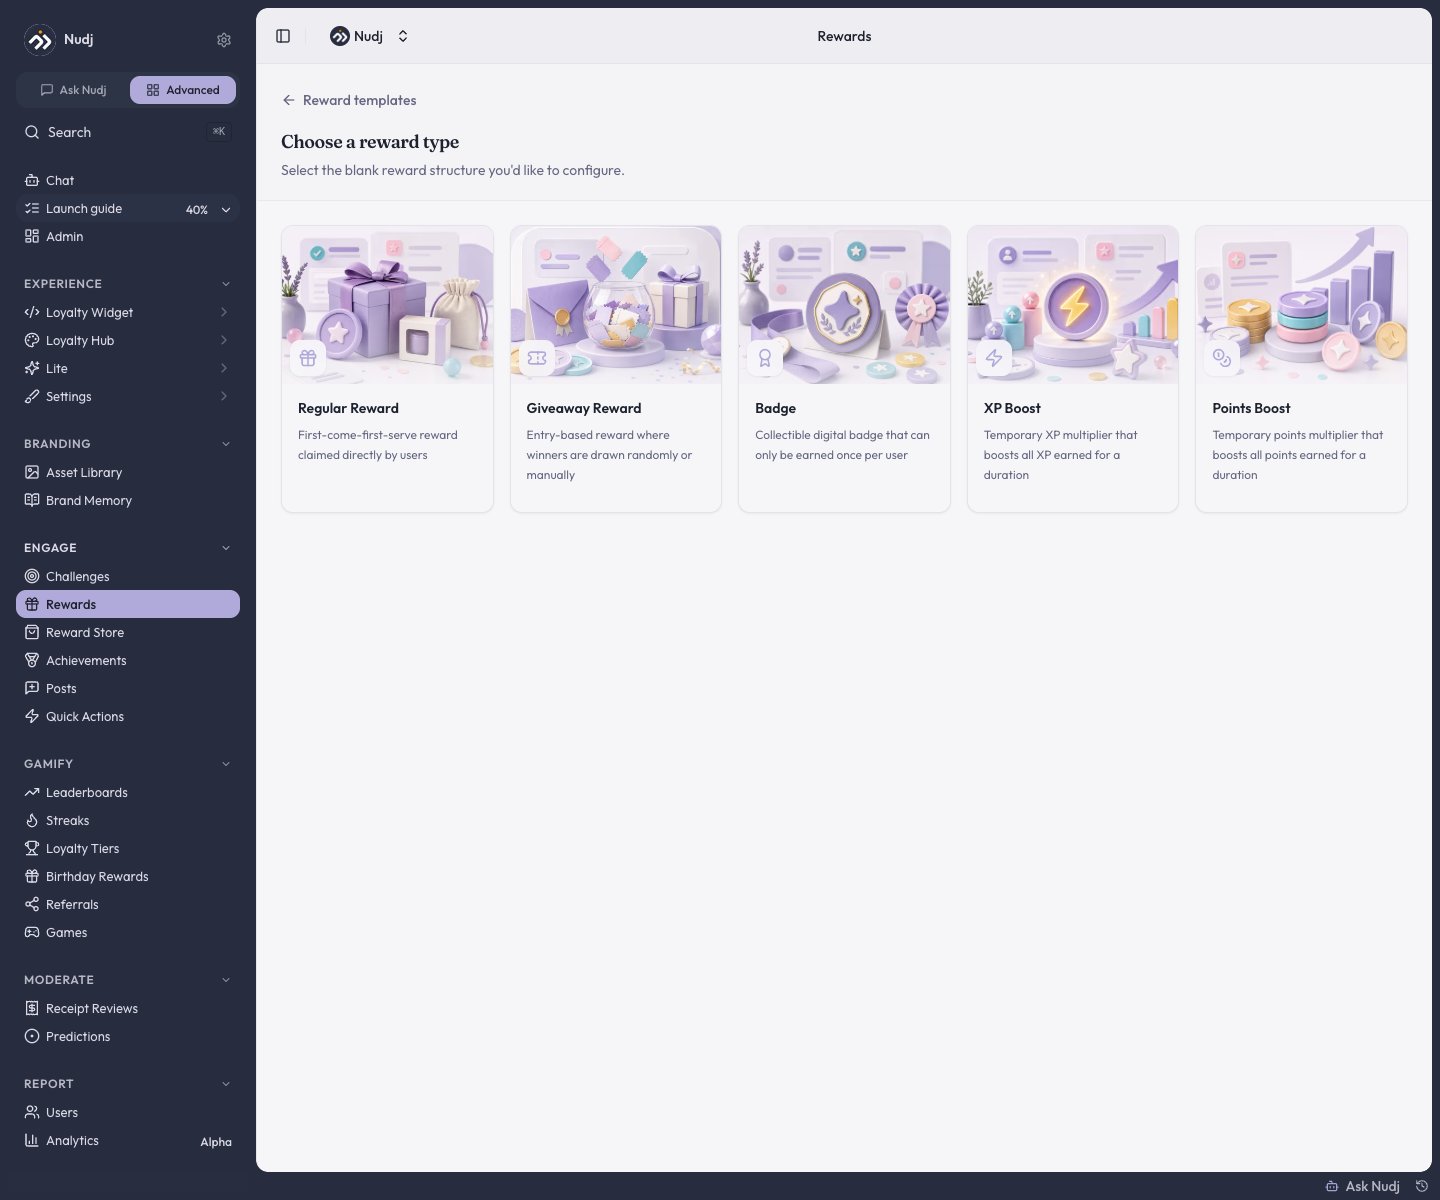
The reward type picker: the blank-reward flow starts by choosing the reward's shape.
There are five blank types - the picker scrolls to show them all:
Type
What it is
Regular Reward
Claimable with points or requirements. Discounts, merch, digital goods.
Giveaway Reward
A prize draw - winners picked randomly or by hand. See Giveaways.
Badge
A collectible emblem for achievements or milestones. See Badges.
XP Boost
An effect that multiplies a member’s XP for a set time.
Points Boost
An effect that multiplies a member’s points for a set time.
Once you pick a type it’s locked in - you can’t change a reward’s type after creation.
The type you pick changes which steps appear. Badge, XP Boost, and Points Boost rewards have nothing to supply, no redemption format, and nothing to fulfil, so they skip the Supply, Redemption, and Fulfillment Details steps. XP and Points Boosts add their own XP Boost Config / Points Boost Config step instead.
A Regular or Giveaway reward has six steps. Only the first four are required; the last two are optional and can be left at their defaults. Move through them with the Next Step button in the sidebar - on the final step it reads Done.
Basic Information
Reward image, title, and description. Required.
Dates
The earning window and the redeem-by deadline. Required.
Supply
How many exist and how many each member can claim. Required.
Redemption
How members actually claim the reward. Required.
Fulfillment Details
Optional info collected from members at redemption (size, address, etc.).
Advanced Settings
Auto-redeem, tags, metadata, cross-community scope, and more.
The top bar keeps a status dropdown (starting on Draft) next to the Create button.
Basic Information: reward image, title, rich-text description, and the Featured / Spotlight toggles.
Title and Description are both required (each marked with a red asterisk). Description is a rich-text editor - at least 10 characters, up to 3,000 - and the toolbar’s expand icon opens a larger fullscreen editor.Click the Reward Image tile to open the image picker (best results at 1440x1080px). It has three tabs: Library (assets already in your community or organisation), Upload New, and Image Gen AI.The left column also has a Featured toggle (surfaces the reward prominently in the member app) and, on manually-claimed rewards, a Spotlight toggle. Auto-redeeming rewards like badges and boosts hide Spotlight. Shop availability is set later, in the Supply step.
Tags, metadata, and the accent colour are not on this step - they live under Advanced Settings. The content-language switcher appears in the sidebar only after the reward is saved.
Dates: the earning window plus the required Use-It-or-Lose-It (redeem-by) date.
Earning Window - a Start Date & Time (when members can begin earning) and an End Date & Time (when earning closes). Members who earned the reward before the window closes keep it and can still redeem it.
Use-It-or-Lose-It Date - the redeem-by deadline (required). After this date, any unredeemed reward expires, no matter how the member got it.
Redemption Viewing Window - how long a member can still view their code or details after redeeming (preset durations or custom).
For a Giveaway, this step relabels to the entries-open / entries-close window and adds the draw date and winner-selection method.
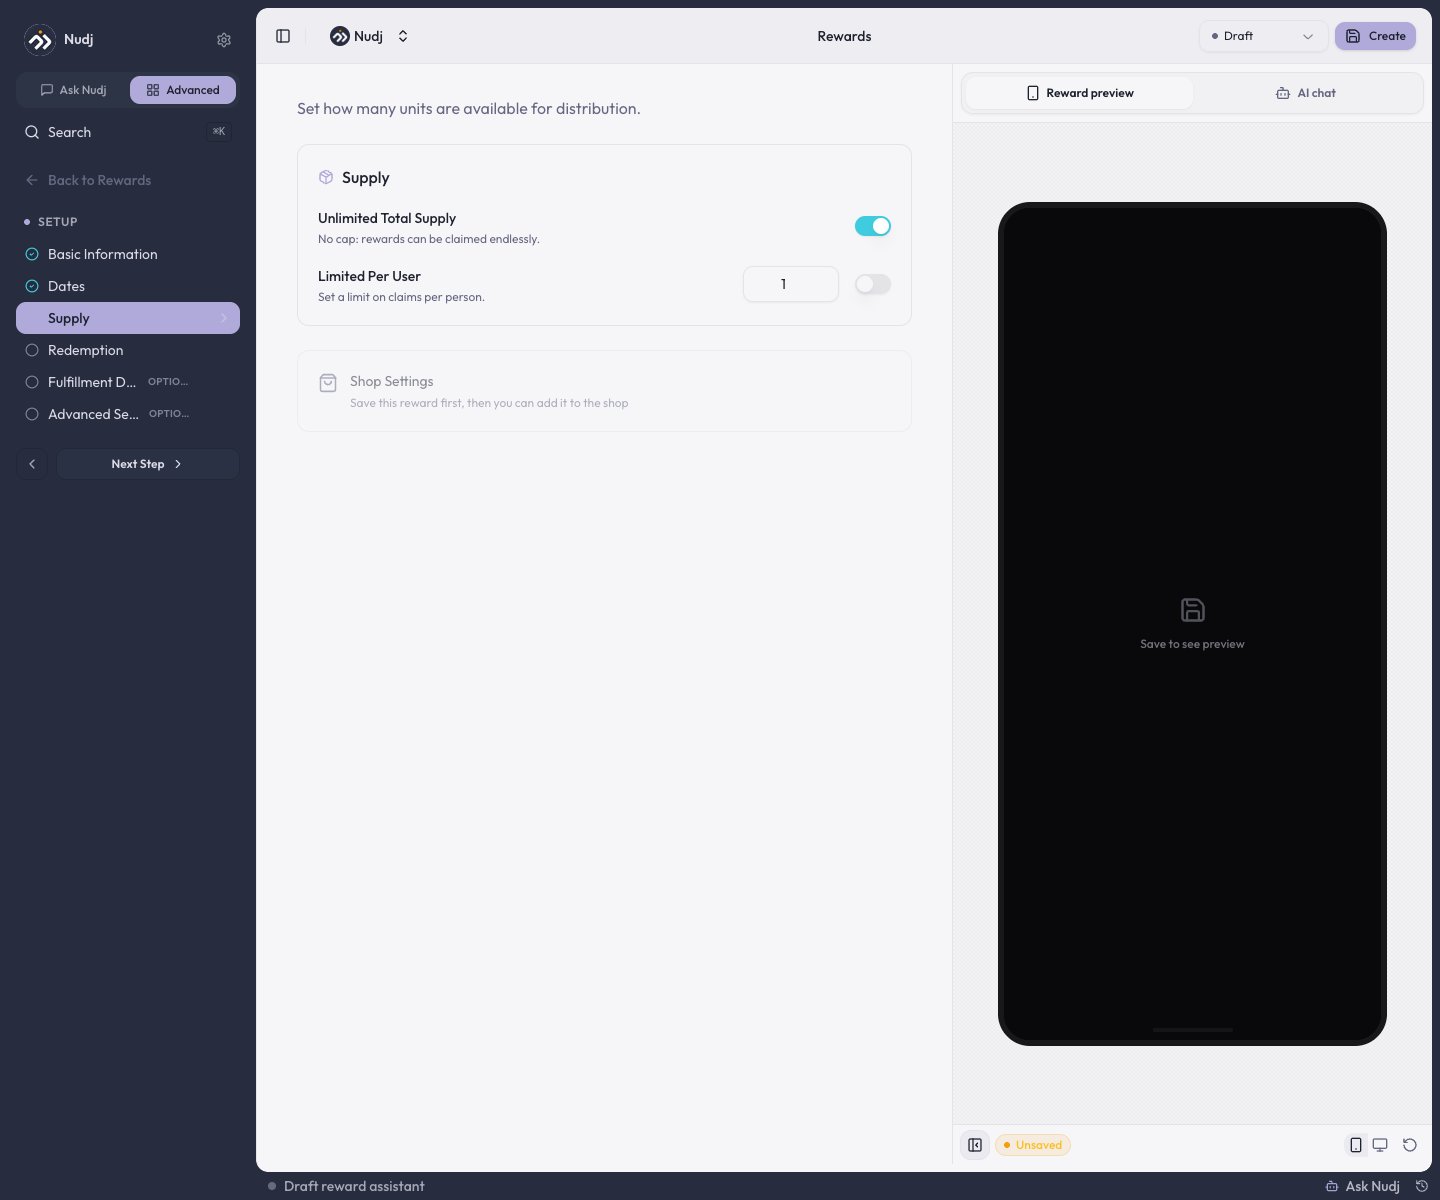
Supply: total supply and per-user caps, each with an unlimited toggle.
Unlimited Total Supply - on by default (no cap). Turn it off to set a hard limit on how many can ever be claimed.
Limited Per User - cap how many one member can claim.
For a Giveaway, this step instead sets the number of winners, max wins per user, total entries supply, and max entries per user.
A reward’s Shop Settings also live here, but the button is disabled until the reward is saved (it needs an ID first). Save the reward, then open Shop Settings to set a point price. See The Reward Store.
Choose a Display Mode: a polished Text-Based Message or scannable Code-Based Redemption.
Redemption, text mode: a rich-text message shown to members when they claim.
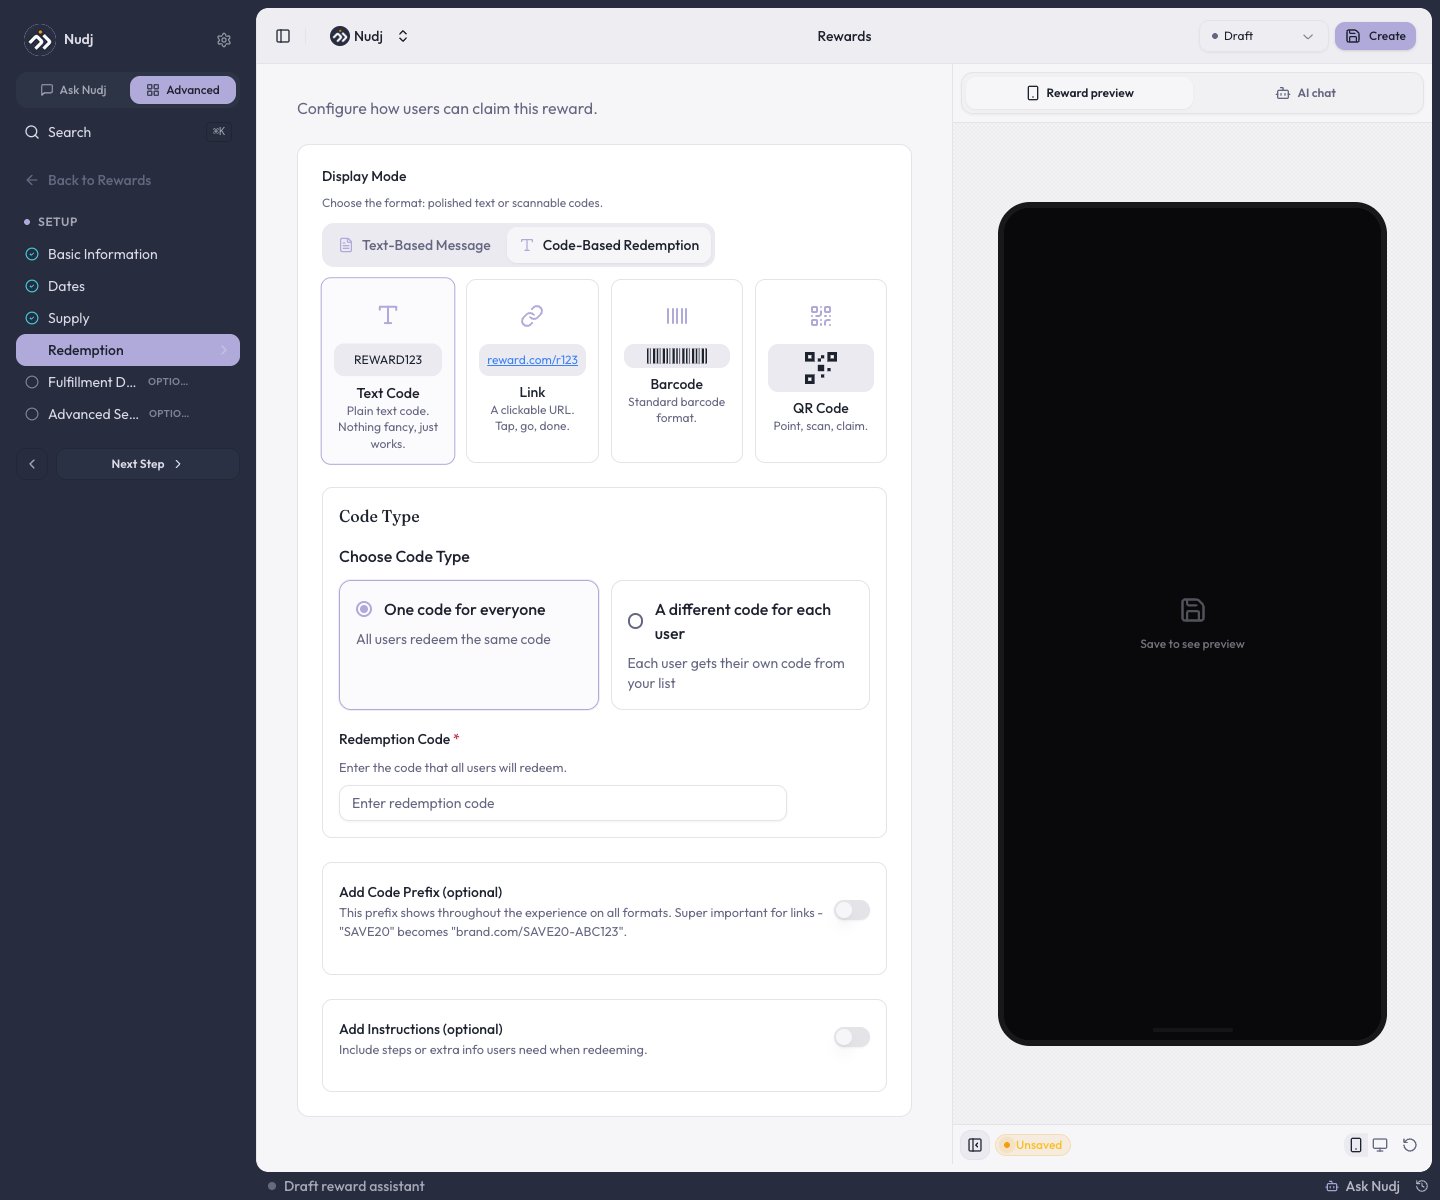
Switch to Code-Based Redemption to hand out codes in one of four formats - Text Code, Link, Barcode, or QR Code - and decide whether everyone shares one code or each user gets their own from an uploaded list.
Redemption, code mode: format picker, one-vs-per-user codes, prefix, and instructions.
Two optional extras sit below: Add Code Prefix (prepended to every code - turns SAVE20 into brand.com/SAVE20-ABC123 for links) and Add Instructions (extra steps members see when redeeming).
For a per-user code list, paste or CSV-upload up to 500,000 codes (max 100 characters each). Re-uploads merge with the existing list and drop duplicates. Keep your own backup - Nudj stores codes but doesn’t expose an export.
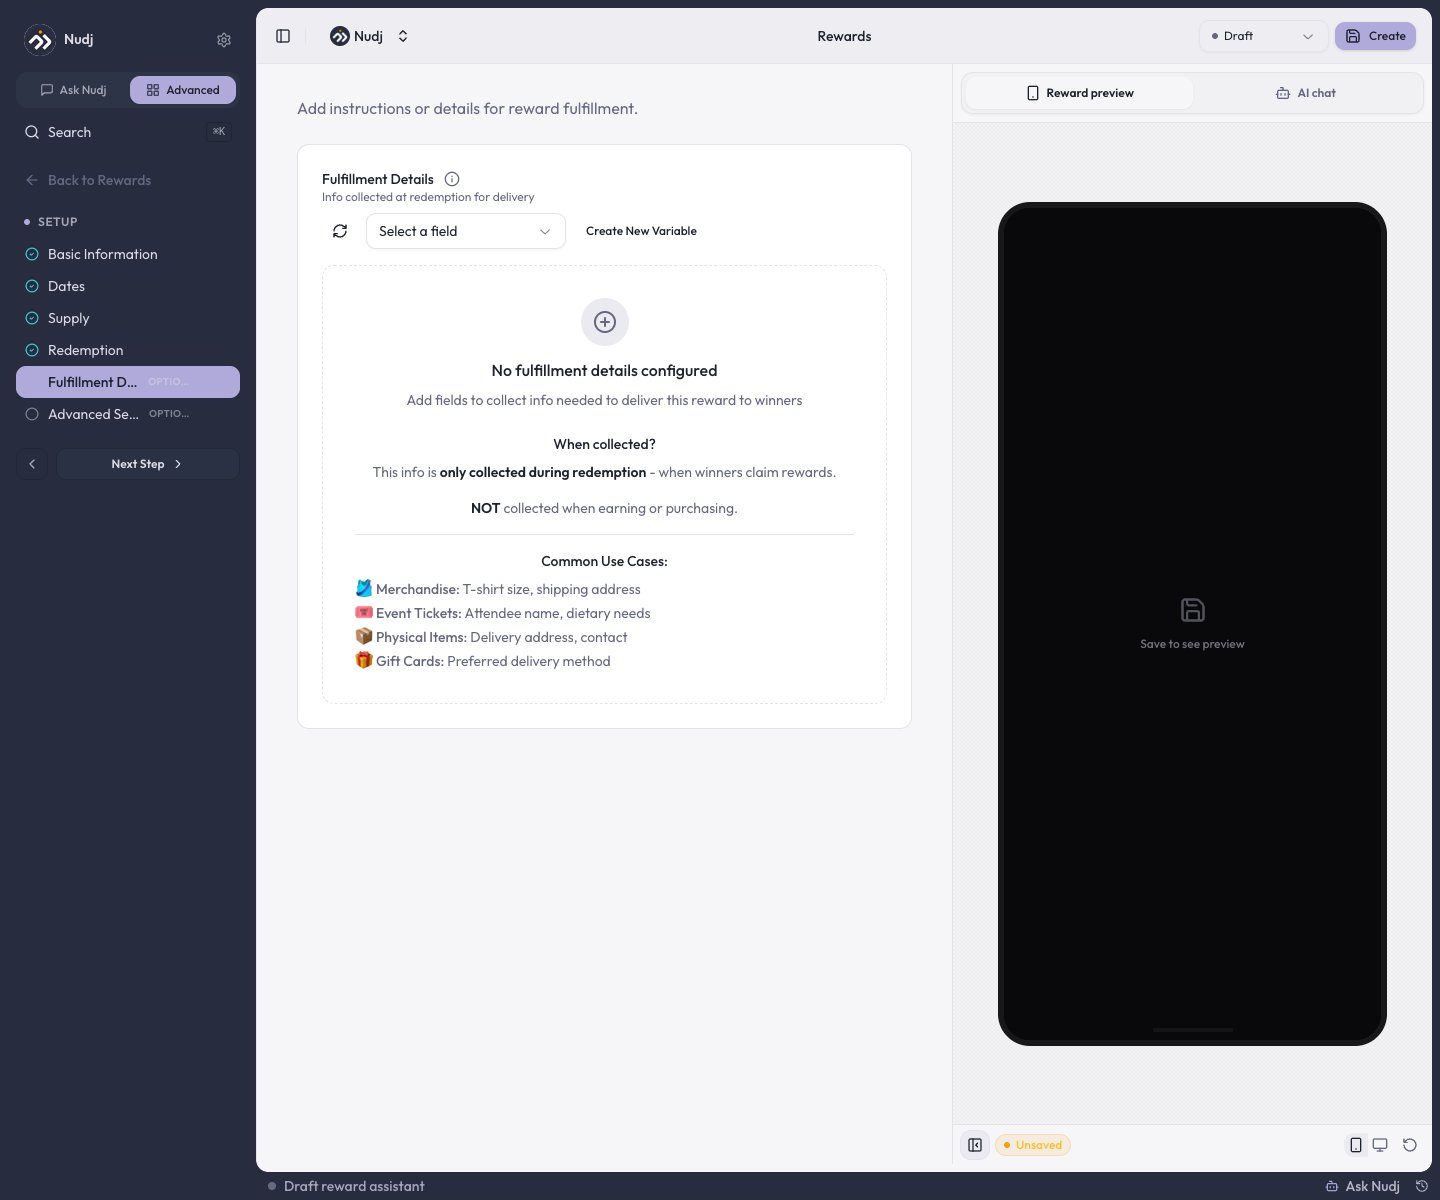
Fulfillment Details: optional fields collected from members at redemption.
This optional step collects extra information from a member at the moment they redeem - not when they earn or buy the reward. Use Create New Variable to add a field, or Select a field to reuse one you’ve defined before.Typical uses: T-shirt size and shipping address for merchandise, attendee name for event tickets, or a delivery address for physical items.
Whatever you collect here shows up later in the reward’s Fulfilment tab, where you confirm and action each redemption. See Redemption & Fulfilment.
The status dropdown in the top bar controls whether a reward is visible and distributing. It has five states: Draft (hidden while you set it up), Live (visible to members now), Scheduled (publishes on the start date), Archived (hidden and retired, kept for records), and Expired (past its end date).
The status dropdown: Draft, Live, Scheduled, Archived, and Expired.
Save any reward as Draft while you finalise copy or wait on assets - a Draft reward won’t distribute even if it’s attached to a Live challenge. Flip it to Live when you’re ready.