

Creating a campaign
From Settings -> Organisation -> Campaign Manager (or via the Admin API/campaigns endpoints):
Name the campaign
Give it a clear, recognisable name — this is what admins see in lists and calendar views.
Set date range
Start and end dates (campaign date-picker z-index fixed in #1731 so it plays nice with modals).
Add challenges
Attach challenges to the campaign from each challenge’s editor: open the challenge, go to the Advanced step, and pick the campaign under Campaigns. A challenge can belong to at most one campaign.
Save
Campaign goes Live immediately (or Scheduled if start date is future).
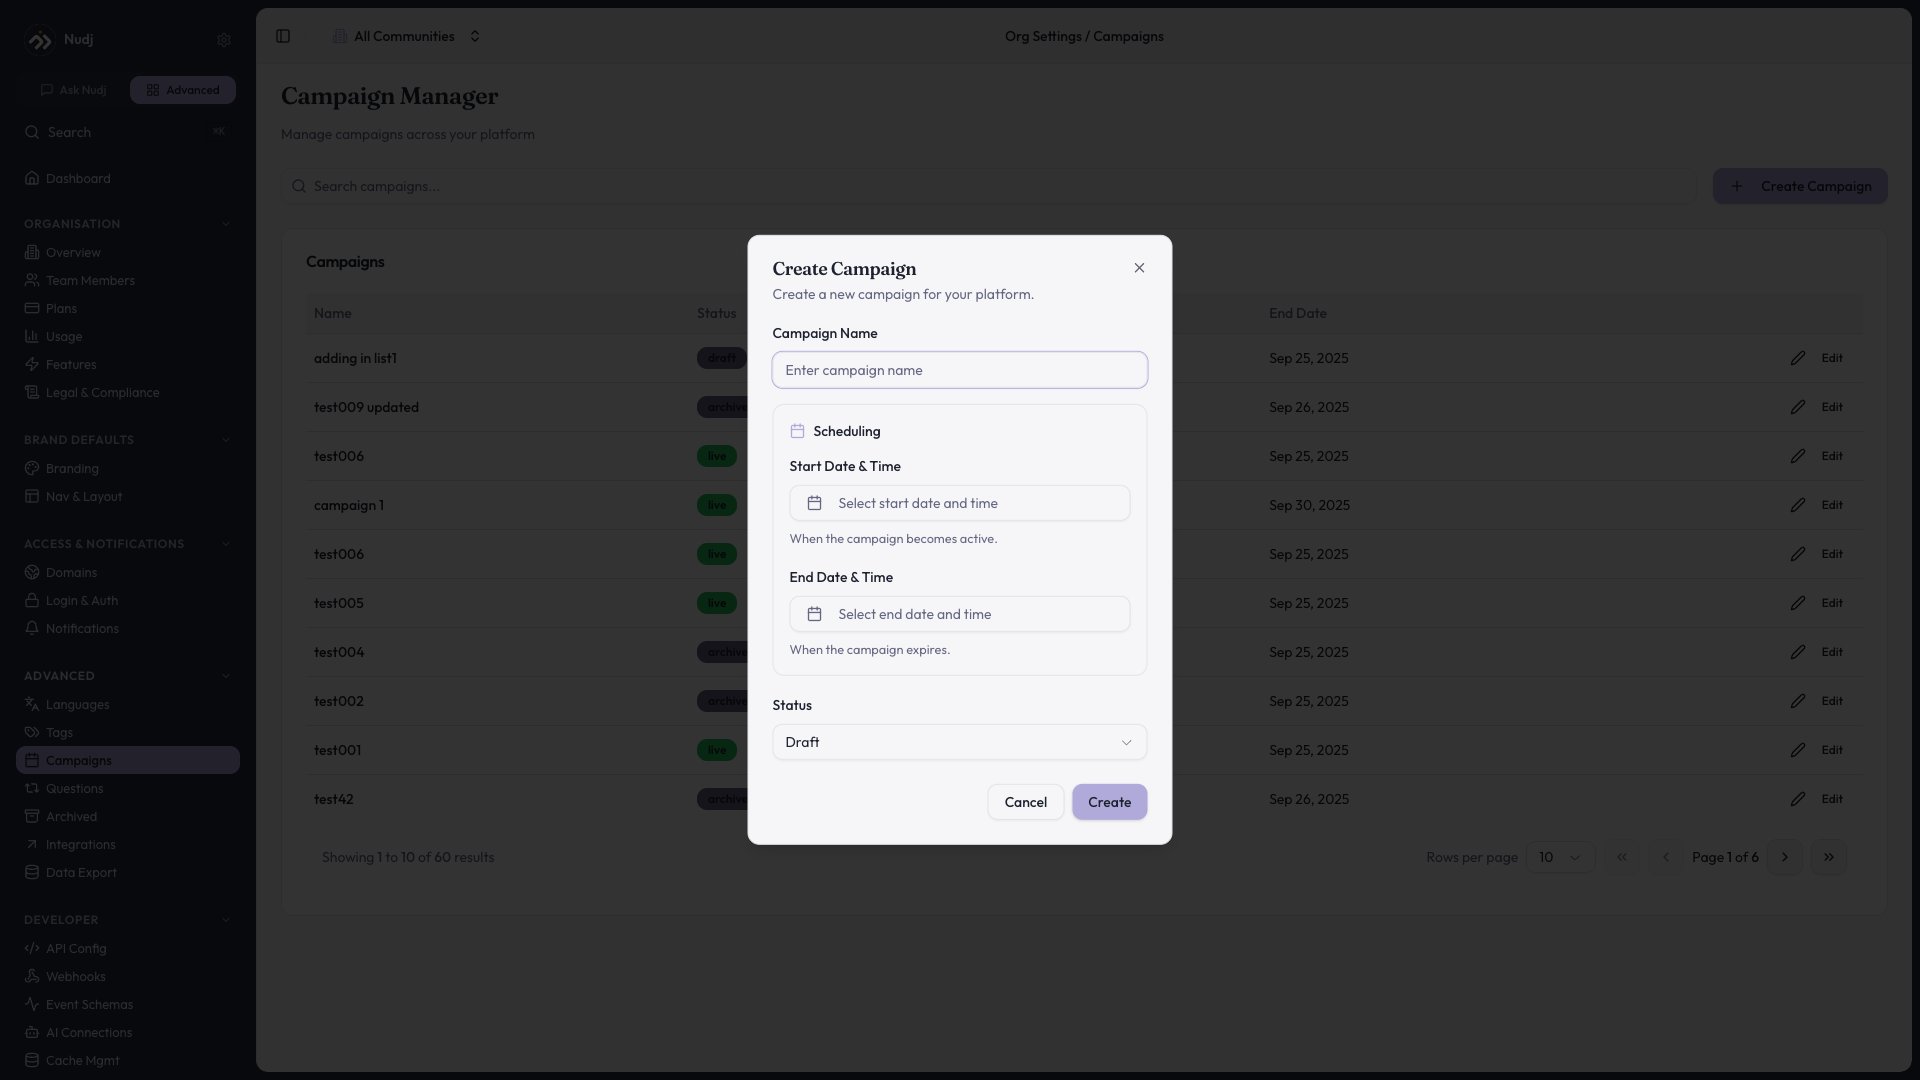
Create a campaign in Campaign Manager (Settings -> Organisation): give it a name, set the schedule, and choose a status.
Campaigns in the calendar
Campaigns show as coloured backdrops in the Calendar View — all challenges in the campaign display together, making scheduling conflicts visible at a glance.Filtering by campaign
The challenge list (#1155) has a Campaign filter in the unified filter drawer. Pick a campaign to see only its challenges.Analytics
Campaign-level analytics show:- Total participants across all challenges in the campaign
- Completion funnel aggregated across challenges
- Reward distribution summary
- Start-to-finish timeline
API
GET /admin/campaigns— listPOST /admin/campaigns— createPATCH /admin/campaigns/:id— updateGET /admin/campaigns/:id/challenges— attached challenges